
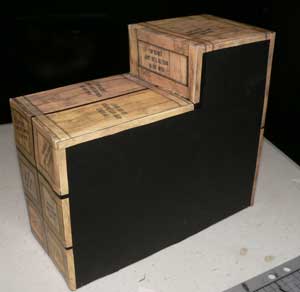
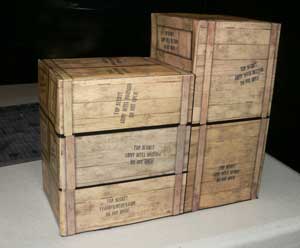
Warehouse Crates – Style B
| Alright. I’m calling this Crate Style “B”. It’s slightly more difficult than “A”. Please read all the directions before starting, and have fun. (Be careful with the knives and glue guns people.) Tools you will need:
Materials:
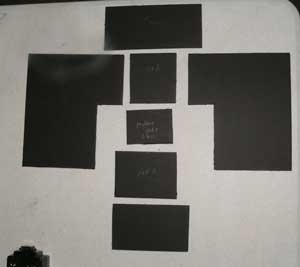
Step 1. Print all the graphics. Cut them out. I tend to cut mine right to the edge of the graphic. However, if you want to make it a little easier, anywhere there is something that is folded under something else, leave and extra 1/8″ or so. The white shouldn’t show when you are done. There are 5 pieces total:
(Download Graphics here.) Step 2. Cut out the Foam Core. I use a sharp craft knife with a metal ruler. Also, try to cut the whole length of straight cuts at one time. Starting and stopping in the middle of a cut will leave youwith jagged edges. For this project there are 7 pieces needed (Assuming 3/16″ Foam
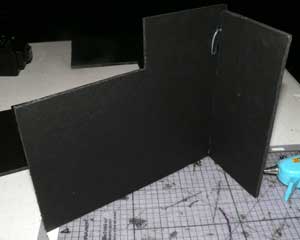
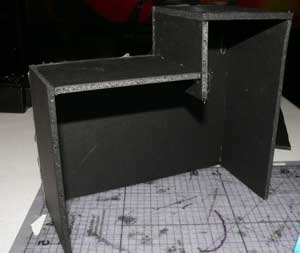
Step 3. Alright, you’re past the hard part. The first construction step is to glue the left side and front. Keep it square! The front should be even with the edge of the side as shown. The front will also be slightly shorter than the side piece. NOTE: I always hold pieces in place before I glue them. Just to check for the right fit.
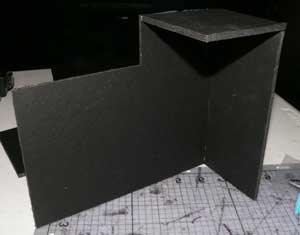
Step 4. Time for the top Front piece. It will fill in the shortness of the front piece. It should be square with the front and side and take up the entire width of the side.
Step 5. The middle top piece is next. I made mine from a left over piece of foam core. If it’s extra long, it won’t matter. That part is inside, and wont be seen.
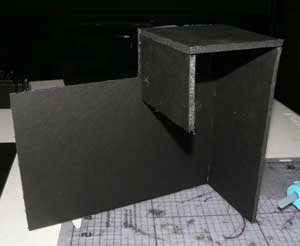
Step 6. Continue with the next two pieces as shown.
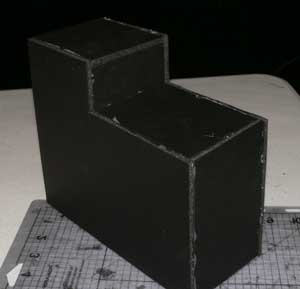
Step 7. Glue the right side on. If everything is
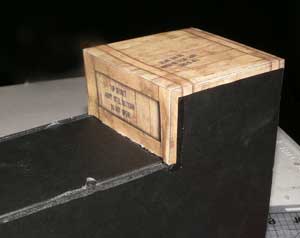
Step 8. Alright, now were coming to decal portion. Before I apply adhesive to any of these pieces, I always fold and test fit them. In this case, each edge has a small tab. I have cut a small square out of each corner so I didn’t have to deal with the excess when I folded them. The first piece to applied is the front top. I left some extra at the bottom inside part of the decal. You will need to trim this to fit. You also need to make a cut on each of the tabs to let it bend around the corner. (And the front, which I didn’t take a picture of.) I run the adhesive along all edges and big “X” across the middle of the piece.
Step 9. Again, test fit before placing the piece. There are two folds on the front piece, one on each side tab. The front is applied square and the tabs around the edges. In addition to the tabs and “X”‘s, on this piece I also put a strip of adhesive down the inside of both sides of the corner.
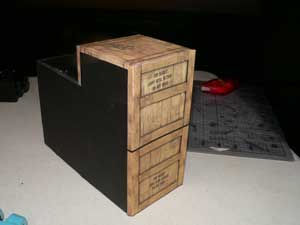
Step 10. Next comes the back top. There is excess “black” on the one end so you can trim it to fit exactly. (If everything is perfect, you will trim most of it off.) You should be familiar with the tabs by now, so on to the next step….
Step 11.
With the way the tab folds work, the biggest most impressive pieces are always last. The side are the next pieces to go on. The trick with them is the lining up the boards that go If you are going to have a one sided display, you could get away with building less. Also, with a little creative decal printing and cutting, you could build each of the stacks Hope you had fun!
|
 
|


Category: D-I-Y
About the Author (Author Profile)
Subscribe
If you enjoyed this article, subscribe to receive more just like it.


Really nice project. It is pretty clever to have one piece representing several boxes instead of making each one of them.